 Pin Recipe
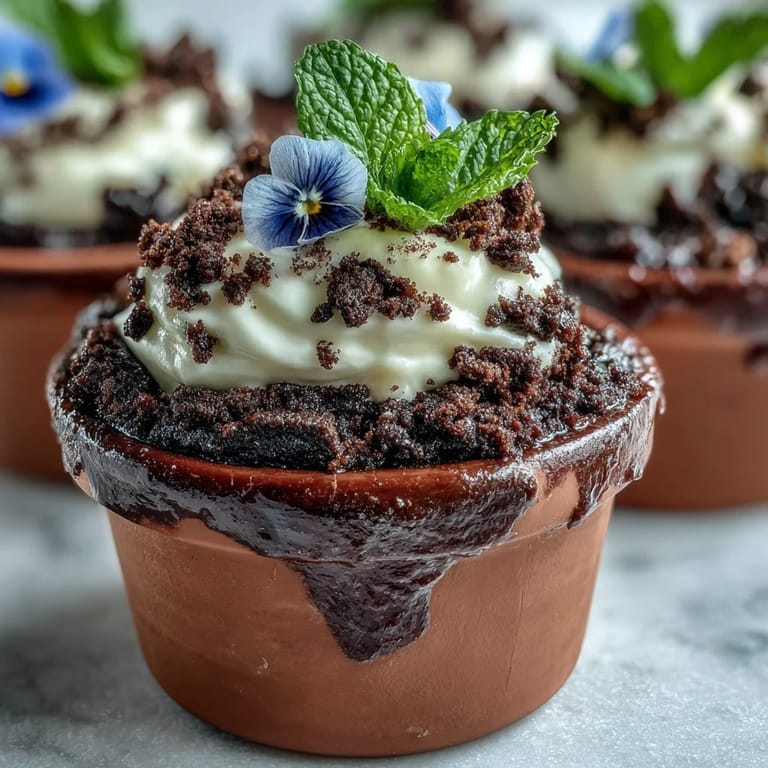
 The very first time I attempted these Mother's Day Flower Pot Brownies, the kitchen filled with such a sweet, chocolaty aroma that my curiosity kept me peeking through the oven door. It rained softly outside, and the windows fogged up, but inside, it felt like I was cultivating an edible garden. I found myself giggling while assembling—especially when a brownie slipped sideways in its little pot. This playful treat has a way of lightening the mood, even before the first bite. There’s something entirely joyful about building desserts that look more like art projects than food.
One Sunday, as we arranged a brunch for my mom, my niece and I got so absorbed in sprinkling Oreo dirt and positioning edible flowers that we forgot about tidying the counters—resulting in a proud, chocolaty mess. We ended up laughing together, fingers sticky with frosting, agreeing it looked even prettier imperfect. That moment has left me associating these brownies with fun, flour-dusted teamwork and springtime warmth.
What's for Dinner Tonight? 🤔
Stop stressing. Get 10 fast recipes that actually work on busy nights.
Free. No spam. Just easy meals.
Ingredients
- Unsalted butter: It melts smoothly and offers a creamy richness—warming it slowly avoids separation.
- Granulated sugar: This balances the cocoa and creates those classic brownies’ shiny tops—don’t rush the whisking.
- Large eggs: Essential for fudgy texture; adding them one at a time keeps the batter silky.
- All-purpose flour: Light hand when folding in keeps brownies tender, not tough.
- Unsweetened cocoa powder: Always choose a quality brand, as it’s the backbone of the chocolate flavor.
- Baking powder: Just enough lift to keep the brownies pleasantly soft, not cakey.
- Salt: A pinch boosts every other flavor—don’t skip it.
- Vanilla extract: A splash rounds out the chocolate and adds warmth—real vanilla makes a difference here.
- Oreo cookies: Crushing them with the filling adds the perfect sticky, crumbly 'dirt' layer.
- Heavy cream: Whips up into a pillow-soft cloud; chill your bowl for best results.
- Powdered sugar: Sweetens the cream and helps it set firmly atop the brownies.
- Edible flowers or gummies: These turn plain brownies into blooming masterpieces—always check they’re food-safe.
- Fresh mint leaves (optional): Add pop of color and a little fresh fragrance, especially lovely in spring.
Instructions
- Prep your pots and oven:
- I like to preheat the oven first so it’s ready, then line my mini flower pots with little parchment circles to keep the bottoms from sticking.
- Make the brownie batter:
- Gently melt the butter on the stove until it just starts to smell toasty, whisk in the sugar and a good pour of vanilla—the shine tells you it's right.
- Add the eggs:
- Crack in each egg separately, whisking until the batter turns thick and glossy—let the kids help here for extra laughs.
- Mix dry ingredients:
- Sift flour, cocoa, baking powder, and salt together, then sprinkle over the wet mix; use a spatula to fold, stopping as soon as the batter looks unified.
- Portion and bake:
- Spoon the batter into the pots about halfway full, smoothing tops—don’t worry about perfection, the 'dirt' hides all.
- Bake and cool:
- Watch for the moment your kitchen smells intensely chocolatey and a toothpick comes out with a few moist crumbs, then let them cool completely before decorating.
- Crush the Oreos:
- Pulse whole cookies in a food processor or smash in a bag; I love the sound and feel free to leave bigger crumbles for more crunch.
- Whip the cream:
- In a chilled bowl, beat the cream with powdered sugar until it's thick and holds peaks; be careful not to overwhip.
- Trim and assemble if needed:
- If you baked in a tray, slice brownies to fit your pots snugly—taste any offcuts, chef’s treat!
- Frost, dirt, and decorate:
- Spread whipped cream over each brownie, cover with Oreo dirt, then add edible flowers and mint leaves wherever they look joyful.
- Chill and serve:
- Pop them in the fridge until you’re ready, but let them sit out for a few minutes before serving for the creamiest bite.
 Pin Recipe
 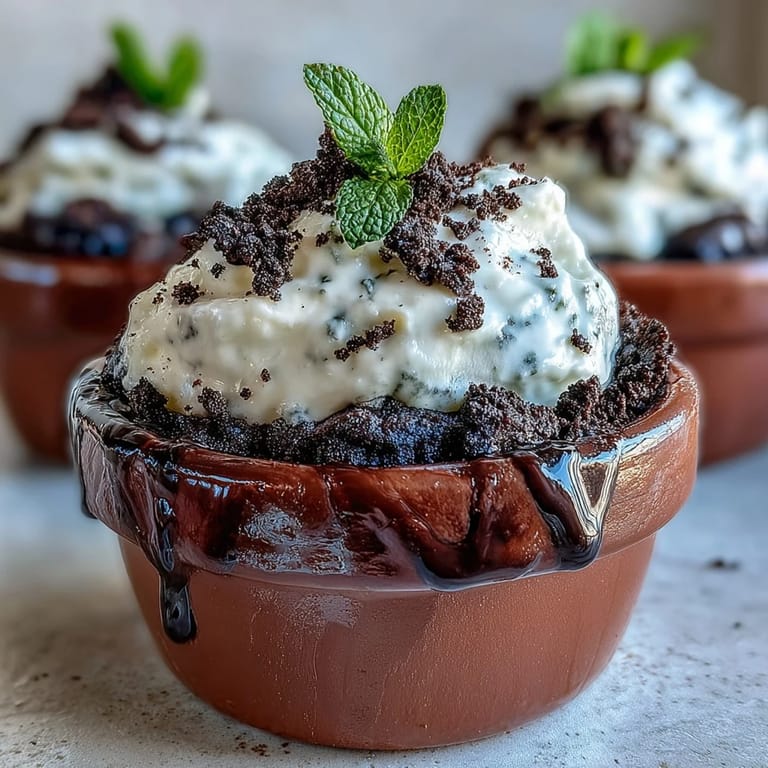 Pin Recipe
 Once, my mom beamed seeing her favorite violets perched atop gooey brownies—she insisted on taking photos and even shared a pot with her neighbor, turning dessert into a sweet little gesture of neighborly love. These brownies seem to make everyone linger at the table just a bit longer, catching up between bites of chocolate 'soil.'
Making the Most of Edible Flowers
After chatting with a local farmer, I learned that edible flowers like pansies taste subtly peppery and violets add a gentle sweetness. They don’t just look pretty—they bring light, unexpected flavors and always spark conversations about what’s edible and what’s decoration. If you’re nervous about sourcing flowers, start with a few petals from verified edible varieties. Wash them delicately—a salad spinner works wonders for drying them quickly. Avoid garden flowers unless you’re certain they’re safe and unsprayed.
Serving These at Brunch (or Any Party)
I once swapped out the edible flowers for colorful gummy candies for a friend’s birthday, and the kids erupted into giggles at their dessert garden. These brownies quietly encourage creativity—everyone tries new combinations and some even gave their pots little candy 'bugs.' There’s no wrong way to serve them, especially if everyone pitches in with decorating duty. The flower pots make perfect single servings so no one fights over the biggest piece. Display them in a tray lined with real greens for maximum wow effect.
Kitchen Clean-Up and Leftover Tricks
I used to dread sticky brownie batter but found that soaking the mixing bowls right away makes washing up easy. Leftover Oreo crumbs keep beautifully in a jar—they’re perfect for sprinkling on yogurt or ice cream. You can freeze extra brownies too, and build a new batch of 'pots' whenever the mood strikes.
- Bring brownies to room temperature for the best fudgy bite.
- Don’t be afraid to load on more 'dirt' than you think—it’s everyone’s favorite part!
- If using flower pots, make sure they’re unglazed and food-safe before baking.
 Pin Recipe
 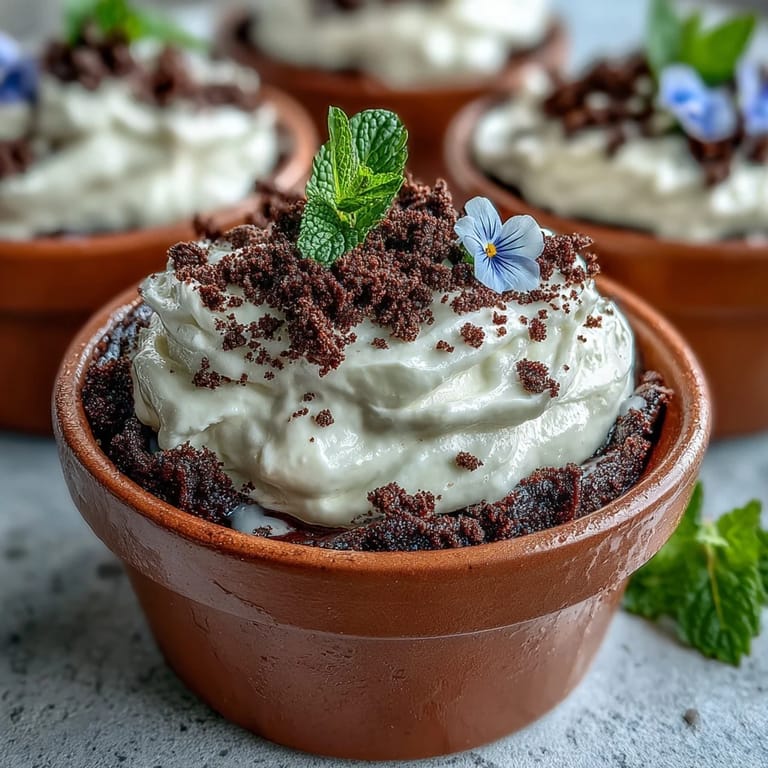 Pin Recipe
 Whether for a special holiday or a just-because weekend, these brownie pots always get a delighted grin. I hope they help you plant a little fun in your next dessert adventure.
Recipe FAQs
- → Can I bake these in a tray instead of mini pots?
Yes. Bake in a lined baking tray, cool completely, then cut rounds or squares to fit the pots. This is often easier and saves cleaning multiple small vessels.
- → How do I keep the brownies fudgy and not overbaked?
Bake until a toothpick comes out with moist crumbs rather than completely clean. Allow the brownies to cool fully; cooling helps them set while retaining a fudgy texture.
- → What can I use instead of Oreos for the 'dirt' topping?
Crushed chocolate cookies, chocolate graham crackers, or a mix of cocoa powder and cookie crumbs work well. For a nutty crunch, finely chopped toasted nuts can be mixed in.
- → Are edible flowers safe and where can I get them?
Only use flowers labeled food-safe from reputable sources such as specialty food markets or farmers' markets. Avoid flowers from florists or gardens treated with pesticides.
- → How far in advance can I assemble and store them?
Assemble and chill up to 24 hours ahead. Keep covered in the fridge to protect the whipped cream and decorations; add delicate flowers just before serving if possible.
- → Can I scale this for a larger crowd?
Yes. Multiply the batter and bake in larger pans or more pots. If using larger serving vessels, adjust baking time and check doneness with a toothpick.