 Pin Recipe
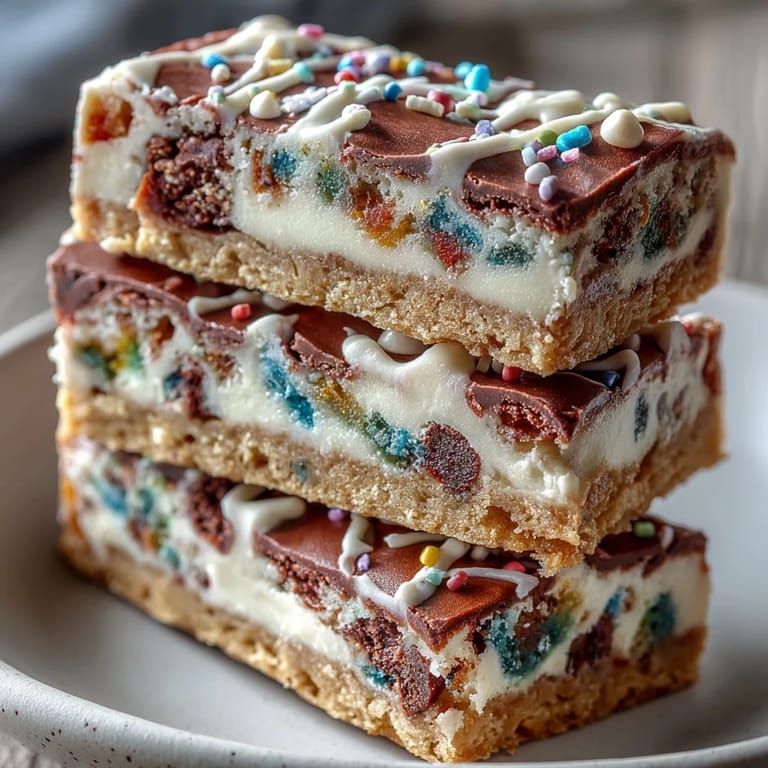
 There's something about the week before St. Patrick's Day that makes me want to bake something loud and unapologetic—no subtle vanilla notes or earthy spices, just pure joy in bar form. I stumbled onto these rainbow cookie bars while hunting through my grandmother's old recipe box, except hers were plain sugar cookies. One March, stuck indoors with a friend who was feeling homesick, I decided we'd transform them into something festive, dumping in white chocolate and every rainbow sprinkle we could find. The kitchen smelled like melted butter and possibility, and watching her face light up when those bars came out of the oven made me understand why some desserts become traditions.
I made these for a potluck at work one March, nervous that bringing rainbow bars to a casual lunch might seem over the top. Instead, they disappeared in twenty minutes, and three people asked for the recipe before I'd even sat down. One coworker mentioned bringing them to her daughter's classroom party, and suddenly these weren't just cookies anymore—they were part of someone else's memory now too.
What's for Dinner Tonight? 🤔
Stop stressing. Get 10 fast recipes that actually work on busy nights.
Free. No spam. Just easy meals.
Ingredients
- All-purpose flour (2 cups): The backbone of these bars; it keeps them tender rather than cake-like, and measuring by weight prevents the dense mistakes I made when I first started baking.
- Baking powder (1/2 teaspoon): Just enough lift to give the bars a delicate crumb without making them rise too much and crack on top.
- Salt (1/4 teaspoon): This small amount makes the sugar taste more like sugar and the chocolate taste more like chocolate—it's the secret whisper in every bite.
- Unsalted butter, melted and cooled (3/4 cup): Melted butter creates a denser, chewier texture than creaming, and cooling it prevents scrambling your eggs when you whisk them in.
- Granulated sugar (1 cup): This is what gives the bars their crisp edges and sweet bite.
- Light brown sugar, packed (1/2 cup): Brown sugar adds moisture and depth, making the interior stay chewy even after a few days.
- Large eggs (2): They bind everything together and add richness without needing extra butter or oil.
- Pure vanilla extract (2 teaspoons): Never skip this; it's the quiet note that makes people ask what makes these taste so good.
- White chocolate chips (3/4 cup): They melt slightly during baking, creating pockets of sweetness; if you're sensitive to white chocolate's waxy feel, use good quality chips.
- Rainbow sprinkles, divided (1/2 cup): Fold some into the batter so there's color throughout, then top with the rest so they don't all sink and disappear.
Instructions
- Heat your oven and prep your pan:
- Set the oven to 350°F and line your 9x9-inch pan with parchment paper, leaving extra hanging over the sides like you're giving yourself a handle. This takes thirty seconds but saves you from scraping melted bar off the pan edges later.
- Combine your dry ingredients:
- Whisk flour, baking powder, and salt in a medium bowl until they're evenly distributed. This prevents pockets of baking powder that taste metallic or dry flour streaks in the finished bars.
- Mix the wet base:
- In a large bowl, whisk the cooled melted butter with both sugars until the mixture looks smooth and a little glossy. Add eggs and vanilla and whisk until there are no streaks of egg white—you want it fully combined but don't need to whisk so hard your arm gets tired.
- Bring wet and dry together:
- Gently fold the dry ingredients into the wet mixture using a spatula, stirring until just combined with no flour pockets visible. Overmixing here makes bars tough, so stop as soon as you can't see the flour anymore.
- Add the fun stuff:
- Stir in white chocolate chips and about one-third of the sprinkles, folding gently so you're distributing them evenly. Save the rest of the sprinkles for the top.
- Spread and top:
- Pour the batter into your prepared pan and spread it evenly with your spatula, then scatter the remaining sprinkles across the top. They'll sink slightly into the batter as it bakes, creating little bursts of color.
- Bake until golden:
- Bake for 25 to 28 minutes, or until the edges are golden brown and a toothpick inserted in the center comes out with just a few moist crumbs clinging to it. Don't wait for a completely clean toothpick or you'll overbake and lose that chewy center.
- Cool completely:
- Let the bars cool in the pan on a wire rack until they're completely cool to the touch. This takes patience, but cutting them while warm will make them fall apart, and nobody wants a crumbly bar.
 Pin Recipe
 I made these last March for my neighbor's son, who was having a rough week in school, and she told me months later that he'd brought them for show-and-tell not as food but as proof that magic existed. That's when I realized these bars aren't about St. Patrick's Day at all—they're about making someone smile with color and butter and a little intentional joy.
Why White Chocolate and Sprinkles Work So Well Together
White chocolate melts just slightly during baking, creating little pockets of sweetness that catch the light when you bite into a bar. The sprinkles stay vibrant and visible, so every slice looks as festive as it tastes. Together, they're childhood-birthday-party nostalgia mixed with grown-up butter and sugar, which somehow feels perfect for a holiday that celebrates both luck and togetherness.
Making These Bars Your Own
I've swapped white chocolate for dark chocolate on nights when I was feeling moody, replaced rainbow sprinkles with green and gold for a more sophisticated St. Patrick's Day vibe, and even drizzled melted white chocolate over the top once with shamrock candies pressed into it. The base is forgiving enough to handle gentle variations while staying recognizable as the same comforting bar.
Storage and Serving Secrets
These bars are actually better the next day after the flavors have settled, and they store beautifully in an airtight container for up to four days without drying out. I learned to cut them into exact squares using a hot, wet knife wiped clean between cuts, which keeps everything looking neat and intentional instead of crumbly.
- Store them in a cool, dry place away from direct sunlight to keep the sprinkles from fading.
- If you want to make them ahead, bake and cool them completely, then wrap them individually in parchment before storing so they don't stick together.
- Take them out about thirty minutes before serving so they're slightly softer and their buttery richness really shines.
 Pin Recipe
 These bars have become my go-to proof that the simplest recipes often bring the biggest smiles. Make them for someone you care about, and watch how something so bright and sweet becomes part of their St. Patrick's Day tradition too.
Recipe FAQs
- → What gives the bars their colorful appearance?
Rainbow sprinkles layered throughout and on top add vibrant colors that enhance the festive look.
- → Can the white chocolate chips be replaced?
Yes, semisweet or milk chocolate chips can be substituted to suit different tastes.
- → How long should the bars be baked?
They bake for 25 to 28 minutes until the edges are golden and a toothpick comes out mostly clean.
- → What texture can be expected from these bars?
A tender, buttery texture with a slight crunch from the sprinkles and creaminess from white chocolate chips.
- → How should the bars be stored?
Store in an airtight container at room temperature for up to 4 days to maintain freshness.